Signed in as:
filler@godaddy.com
Signed in as:
filler@godaddy.com


I have been living in her while building her out, and I have gone through many stages. At first it was "stuff the van and go."
At one point, my entire life was spread across the Marina beach in Hood River as I insulated my floor.
I hit the functional but disorganized stage, where my essentials like running water and stove were dialed in, but my stuff was still in totes and bags.
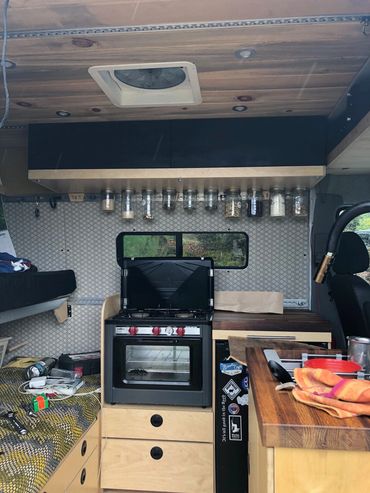
Now, I have drawers and jar organizers. Shelves and cabinets. Insulated and finished doors.


The floor gets 1/2 in Polyiso. Heat rises, but I still need to protect from convection under the van.
The ceiling gets the most, with a layer of 1 in Thinsulate, 1 in Polyiso, and EZ Cool to hold it all in. I use 3M 90 spray adhesive to stick the layers up initially, and the EZ Cool gets stuck up with reflective tape. The tape gets covered with the wooden slats, so everything is held up mechanically.

I use CRL 10x30 windows. It's a dead giveaway that you're not just a cargo van, but so are the kayaks and rocket box on my roof.
I make a template out of Masonite. Masonite keeps a good smooth edge, and is far more accurate than cardboard, especially after repeated use. It's also far less expensive than MDF.

Mask both the van and the jigsaw base. Cutting is straightforward. There is a forgiving tolerance with the window flange, but I aim for tight tolerances regardless.
Once cut, make sure to paint the raw steel edge to prevent rusting. I use an epoxy based appliance touch-up made by Rustoleum.

CRL windows come with a foam gasket. Make sure the gasket is neat and flush against the flange. Double check for wrinkles or overlap where it meets itself. No need for additional sealant, but do make sure to tighten the screws all the way so the gasket compresses visibly.

This porthole is also from CRL.
No template here, just trace your line with a compass

CRL does not include a gasket on this window. You can purchase a gasket from them separately if you like. I use butyl tape since I have it in stock for fan installation.
We use cookies to analyze website traffic and optimize your website experience. By accepting our use of cookies, your data will be aggregated with all other user data.